
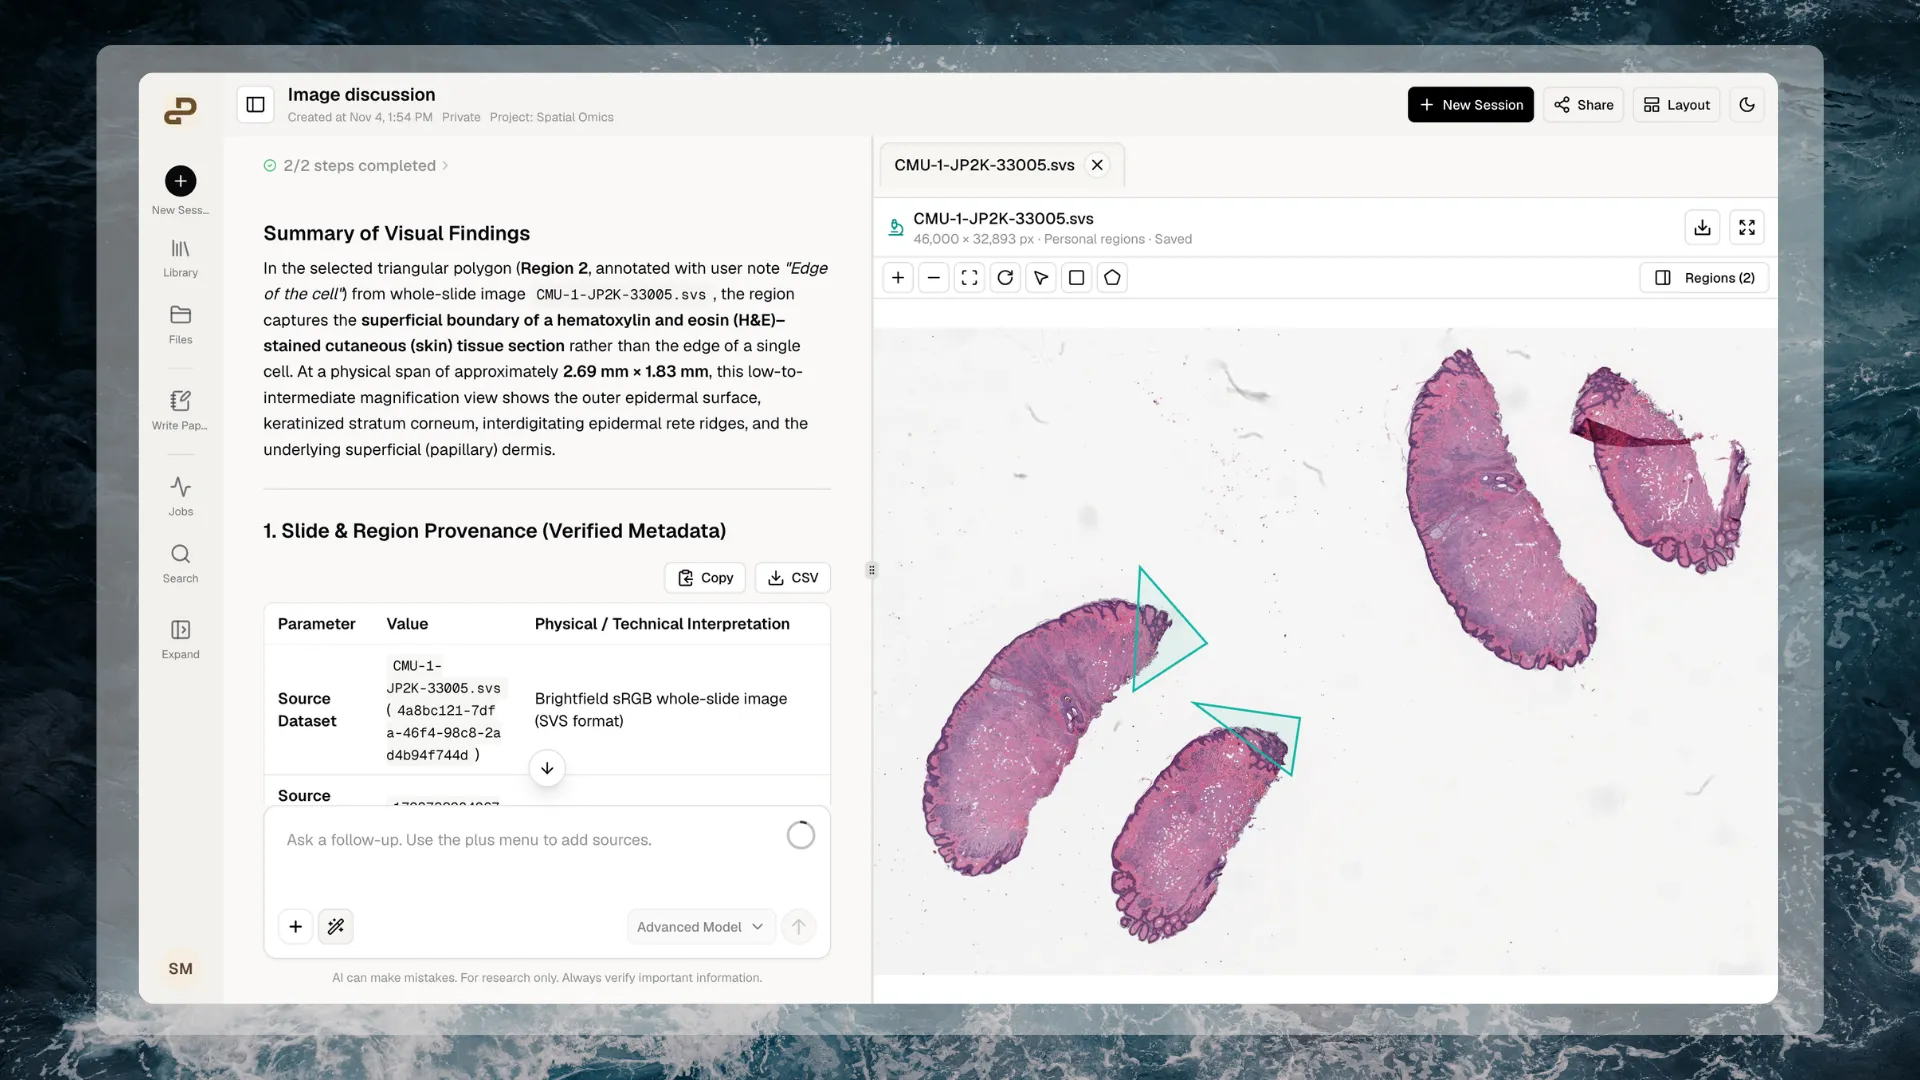
Inspect a slide and keep regions of interest alongside your workspace.
Supported files
The slide size limit is 500 MiB per file. A successful upload does not guarantee that every image layout or encoding can be viewed. Extensions are case-insensitive; keep the full filename ending, such as
sample.ome.tiff or sample.ome.zarr.zip.
Renaming a normal TIFF to .ome.tiff, or an arbitrary ZIP to .ome.zarr.zip, does not convert its contents.
Check OME files before uploading
- OME-TIFF: export a tiled, single-image file. Supported compression includes uncompressed, LZW, Deflate, PackBits, and JPEG. OME-TIFF using JPEG2000 is not supported, even though supported SVS files may use it.
- OME-Zarr: use Zarr v2 and put the image store directly at the ZIP root. Do not add an enclosing folder or combine several images into one archive.
- ZIP packaging: choose Store, also called
ZIP_STOREDor no compression, for the surrounding archive. Compression inside the Zarr data is separate; not every internal encoding is supported. - Channels and image levels: OME images support up to 64 available channels and 32 image levels. You can display up to six channels together. Images must also stay within supported metadata and image-chunk sizes.
How your file is prepared
- Upload a supported file through Files, or attach it to a conversation. Wait for the upload to finish.
- Purna checks that the image is readable and prepares its viewing information, including dimensions, available image levels, channels, and physical scale where supplied.
- Open the file to view it. While preparation is pending, the tab shows Preparing viewer… and continues automatically when ready.
Working with your data
Open and arrange a slide
Open the file from Files or a chat attachment. On desktop, drag the workspace divider to resize the viewer pane. Use the expand icon for a larger canvas and collapse it to return to your workspace. Use the toolbar to pan, zoom in or out, and fit the image to the available space. Where offered, rotate the slide to inspect it from another orientation. Download the original with the download icon. You can switch between file tabs while working. The viewer retains your current view across tab switches. Wait for Saved before closing or reloading if you have edited a region or its notes.Adjust image display
For supported OME images, open the available display controls to choose channels, adjust their colors and intensity ranges, or switch Z and T planes when those dimensions exist. RGB images use their original color mapping. These settings change the display, not the original measurements. A brighter channel or different color does not establish a biological difference. Keep the selected plane and channel settings in mind when comparing regions.Select a region
- Choose the rectangle or polygon tool.
- Draw around the area you want to inspect.
- Open Regions and select the region if its details are not already visible.
- Enter a meaningful name and optional notes, such as
Tissue edge — check staining.
Save and revisit regions
Regions save automatically. Use the save icon to save the current edit immediately, and wait for Saved before leaving. The delete icon removes the selected personal region; it does not delete or alter the image. Your named regions, notes, viewport, and supported display settings belong to your personal view of that file. They are not edits to the source or shared annotation editing. Reopen the same file to revisit successfully saved regions. Replacing the source file starts a new view. Regions from the previous file are not automatically transferred to its replacement. Downloading the original does not include your personal regions and notes.Select cells when your data supports it
A slide region is an area of an image, not a list of identified cells. Drawing around tissue does not detect, count, label, or segment cells automatically. For prepared datasets with cell identities and coordinates, use the Spatial Omics Viewer. Its available tools can select cells with a lasso, select existing cell groups, and coordinate highlighting across linked views. Those capabilities require prepared cell data; a slide image alone does not supply it.Use a region in chat
- Select a region and review its name, notes, image plane, and display settings.
- Choose Use in Chat.
- Choose Start a new chat, or an existing chat in the image’s project. The dialog lists recent chats; type to filter them.
- Review the region preview, region-details file, and source-file reference added to the draft.
- Add your question and send the message when ready.
Working with agents
Agents can work with your files and read the selection details you explicitly share, including region coordinates, names, and notes. Use them to help with analysis, statistics, and scripts. They can help check metadata, describe a reproducible analysis, or write code to examine original data. For example, you can ask:- “Read the selected region’s coordinates and calibration. Write a script to report its dimensions, and explain any missing information.”
- “Help me design a comparison between this region and surrounding tissue. List the required measurements and statistical assumptions before calculating anything.”
- “Check whether this slide contains the channels and metadata needed for my analysis. Do not infer cell identities from the region name.”
Limitations and files that will not work
The interactive Slides Viewer is a desktop web feature. Mobile viewing does not provide the same interactive tools. Large images, many channels, and limited browser memory can affect responsiveness even when a file is supported.
Automatic segmentation, cell detection, biological interpretation, shared annotation editing, and agent-created viewer overlays are not part of this release.
Troubleshooting
When contacting support, include the filename, extension, file size, exact error, and the action that failed. Avoid sharing sensitive image contents unless requested through an appropriate support channel.
Return to Scientific Components, explore cell-based data in the Spatial Omics Viewer, or see Files for uploading and organizing your data.